Welcome to Sellery! Once your inventory has been imported into the system, you’re ready to get started. The following steps are meant to represent the bare minimum requirements to get Sellery's automatic repricing up and running. For more information and in depth details on all of the features and functions of Sellery, please refer to our Help documentation and videos here:
https://sellerengine.zendesk.com/hc/en-us/categories/200047065-Sellery-Help
Overview
There are three main sections of the application:
- Receiving
- Inventory
- Settings
Getting Started
The first step to boosting your sales and maximizing profits with Sellery is to ensure that the automatically calculated lower limit, called the Minimum Price, is as accurate as possible. This Minimum Price is essential to optimizing repricing for your items by making sure you're staying as competitive as possible while not losing money and, ideally, making a profit on each sale.
You'll start by making sure Sellery has an accurate cost value for each item in your inventory.
Cost is what you paid for the item, commonly referred to as the COGS or Cost of Goods Sold.
Please refer to the following link for instructions on the various avenues you can use to set costs for your items:
https://sellerengine.zendesk.com/hc/en-us/articles/200641025-Cost
Now that you've updated your costs, you'll want to make sure that your Minimum Price calculation includes accurate values on what you will pay to send your items either to an Amazon FBA Warehouse or to the buyer directly. Please remember, these shipping values are meant to represent your expense for shipping this item, not the shipping fee you charge the buyer as dictated by your Amazon Seller Central Shipping settings.
For detailed instructions on setting up your Shipping Carriers, go here:
https://sellerengine.zendesk.com/hc/en-us/articles/200641065-Shipping-Carriers
Once you've set up your shipping carriers, you can apply them to different smart lists in your Shipping Overview. Details on that can be found here:
https://sellerengine.zendesk.com/hc/en-us/articles/200641085-Shipping-Overview
Now that you've set your costs and shipping information, your Minimum Price calculation should represent your break even point, or, what you must sell that item for at minimum to avoid taking a loss on the sale.
Next, you'll need to decide what to list, where to list it, and at what price. To do this, you’ll first need to segment your inventory items into what we call Smart Lists. These are dynamically updating buckets that group your inventory items together using criteria you define.
To create a new smart list, navigate to the Inventory page and look to the left to see a list of the current smart lists that exist in your account. At the bottom of that list, click on New Smart List and name your smart list. It will then appear in the list and a filter panel will open automatically. Later, you can click on the round cog icon to the right of your smart list(s) to edit your filters.
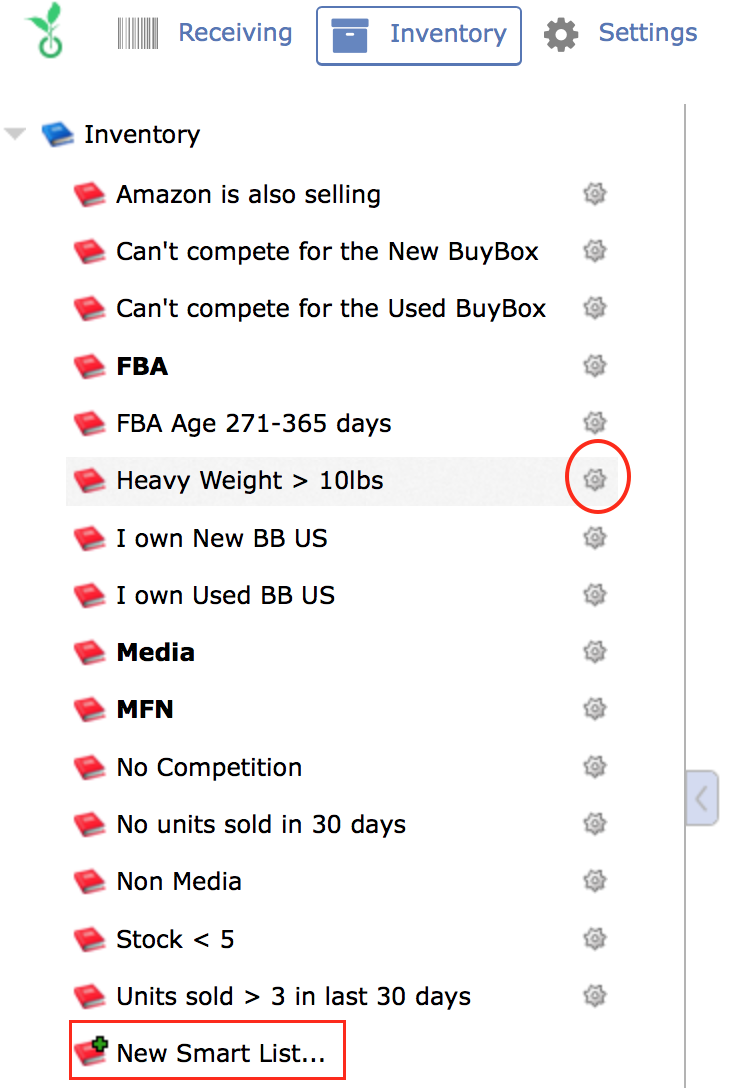
The idea behind smart lists is to group inventory items together that have similar traits and/or pricing strategies. For example, you could create a smart list for all of your FBA items with a sales rank greater than 10,000 and then apply a specific pricing strategy to those items. Once you’ve finished defining your filters, click save and watch your new smart list instantly populate with items now belonging to it. You can create as many smart lists as you’d like. 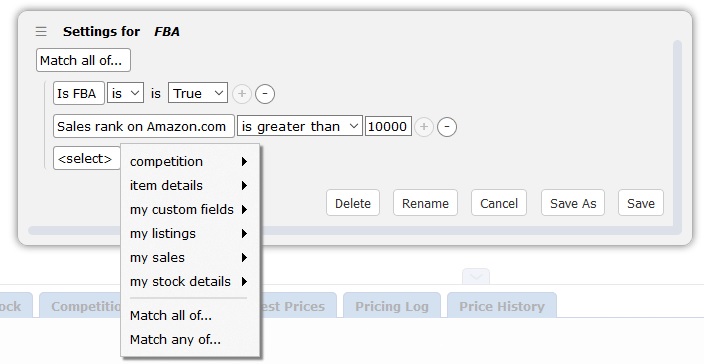
Once you’ve created your smart lists, you’re ready to define your pricing strategy.
Go to Settings > Pricing Rules and click new. Type a name for the pricing rule and it will appear on the left. Choose what type of pricing rule to create. You have two options to choose from:
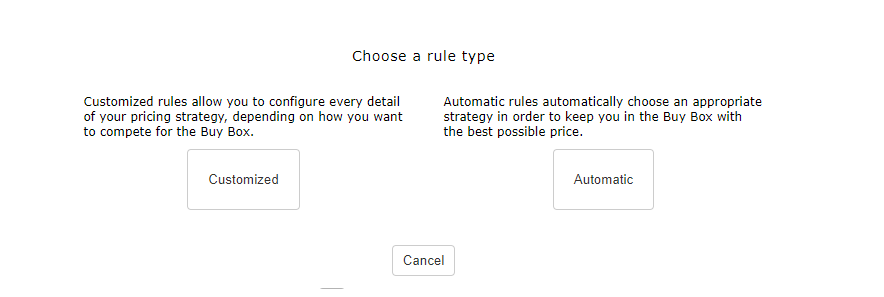
Customized - You will set up the pricing rule from scratch based on the pricing strategy you need to apply. You will have multiple and flexible options to combine and use in the set up.
Automatic - Depending on the current status of your items and your competitors, the Automatic Pricing Rule will apply one of the built-in strategies designed to maximize your revenue while keeping you ahead of the competition.
For more information on how the Automatic Pricing Rule works you can check the full description of the built-in strategy here.
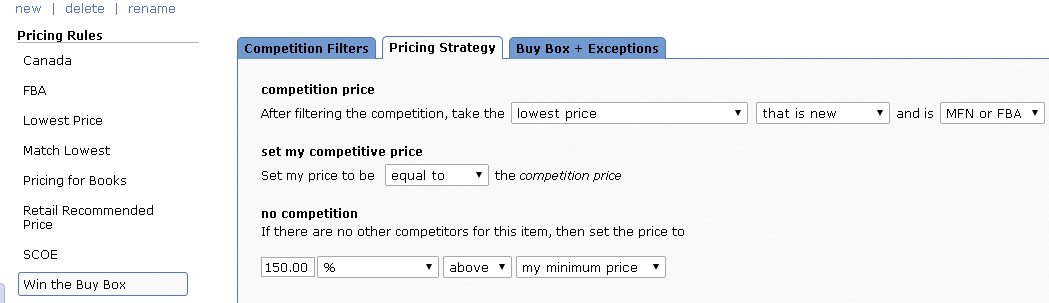
A Customized Rule has three sections: competition filters, pricing strategy and buy box + exceptions.
For more information about Pricing Rules, see this link:
https://sellerengine.zendesk.com/hc/en-us/articles/200640965-Pricing-Rules
You can create one or more Pricing Rules.
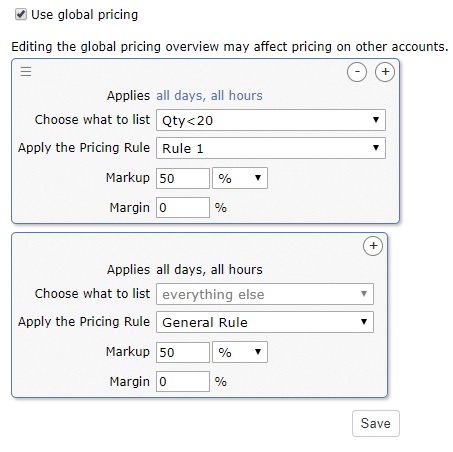
Once you have pricing rules set up, apply them to your whole inventory or to individual smart lists in the Pricing Overview. You have a global pricing overview setup for accounts containing multiple Amazon venues, but you can optionally override this for specific selling accounts.
The Pricing Overview consists of mappings of your smart lists and pricing rules. For each mapping, you’ll pick a smart list which identifies a part of your inventory and what Pricing Rule you'd like to apply to that group of items. To reprice the entire inventory you'll keep 'Everything' priced with the pricing rule of your choice. The Pricing Overview is read from top to bottom, on a first come, first served basis. This means that because an item can belong to multiple smarts lists depending on their criteria but can only be priced using one strategy, whatever smart list/pricing rule mapping an item hits first, is the price and strategy that will be applied to it.
Choosing 'Do Not List', creates an easy way to block certain items from being listed on your Amazon account(s). This option is only valid for Merchant Fulfilled items in Sellery accounts that have inventory management settings enabled. Setting a smart list to ‘Ignore’ means that Sellery will not send price or listing changes to Amazon for that item.
Should you desire a mark-up or margin be added to the Minimum Price calculations of your Whole Inventory or a particular smart list, that value should be added to the appropriate field in the Pricing Overview rule/smart list mapping.
Each Pricing Overview mapping of any smart list and pricing rule has a link, titled ‘all days, all hours’/ you can click on to schedule. Scheduled Repricing is a feature that gives sellers the ability to plan pricing strategies based on different time frames in advance. You can set up these strategies in the Pricing Overview section.
Once you’ve got your pricing rules mapped appropriately to your smart lists and you've spot checked the prices Sellery is calculating, you’re ready to send your price changes live to Amazon! To do that, go to Settings > Accounts and make sure you turn the slider labeled ‘Manage my listings/prices on Amazon’ to 'on' for each account you wish and finally, 'Save'. Sellery will then continue pricing your items according to your Sellery settings and update your listings/prices on Amazon.
If you need further assistance or more detailed instructions, please check out our help documentation by clicking Help in the upper right hand corner of any Sellery screen or send an email to sellery@sellerengine.com.
Thanks and good luck!
Your SellerEngine Software Help Team
Comments